Centre Workflow
Run the daily patient and test workflow.
Use these steps to start from the Dashboard, create tests quickly, manage Drive links, update status, and complete the handoff after reporting.
Daily Routine
What technicians usually do
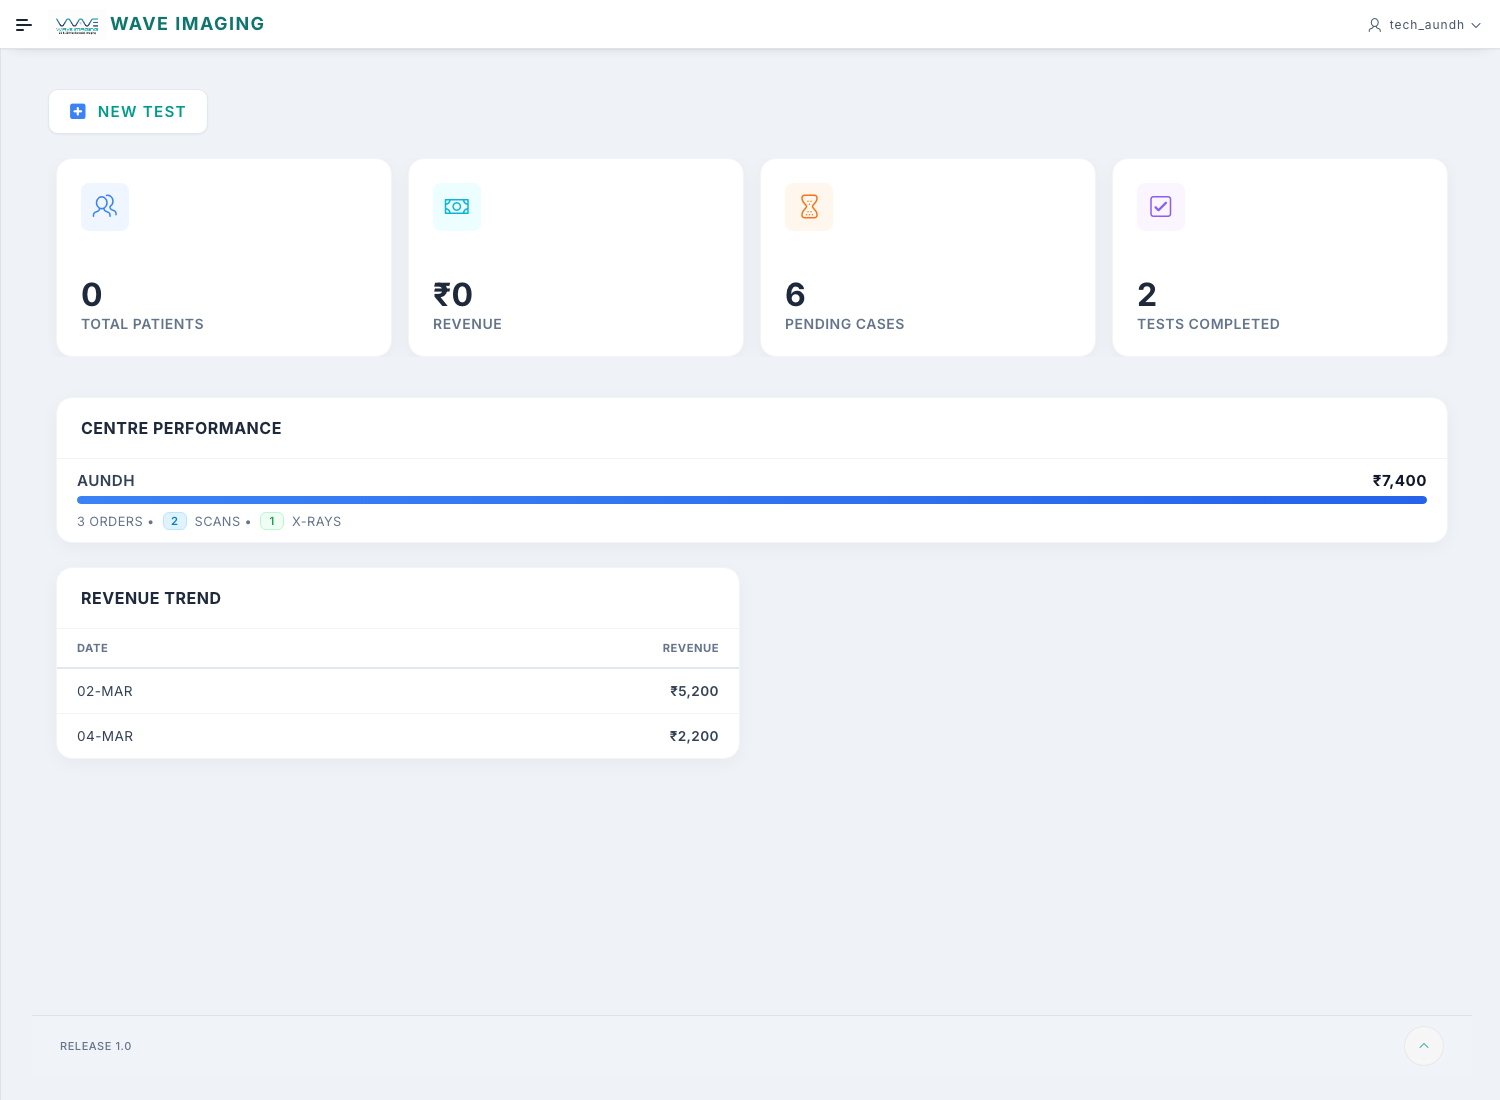
Start on Dashboard
Use New Test for most day-to-day work.
Use New Test for most day-to-day work.
Create the patient inside New Test if needed
Search first, then use the plus button if the patient is new.
Search first, then use the plus button if the patient is new.
Use Tests as the main working screen after creation
Update status, open links, print, and send WhatsApp from there.
Update status, open links, print, and send WhatsApp from there.
Dashboard
Start from Dashboard
- Open Dashboard.
- Review today's workload if needed.
- Use New Test to begin the standard patient flow.
For most technicians, Dashboard and Tests are the main working screens.
Patient
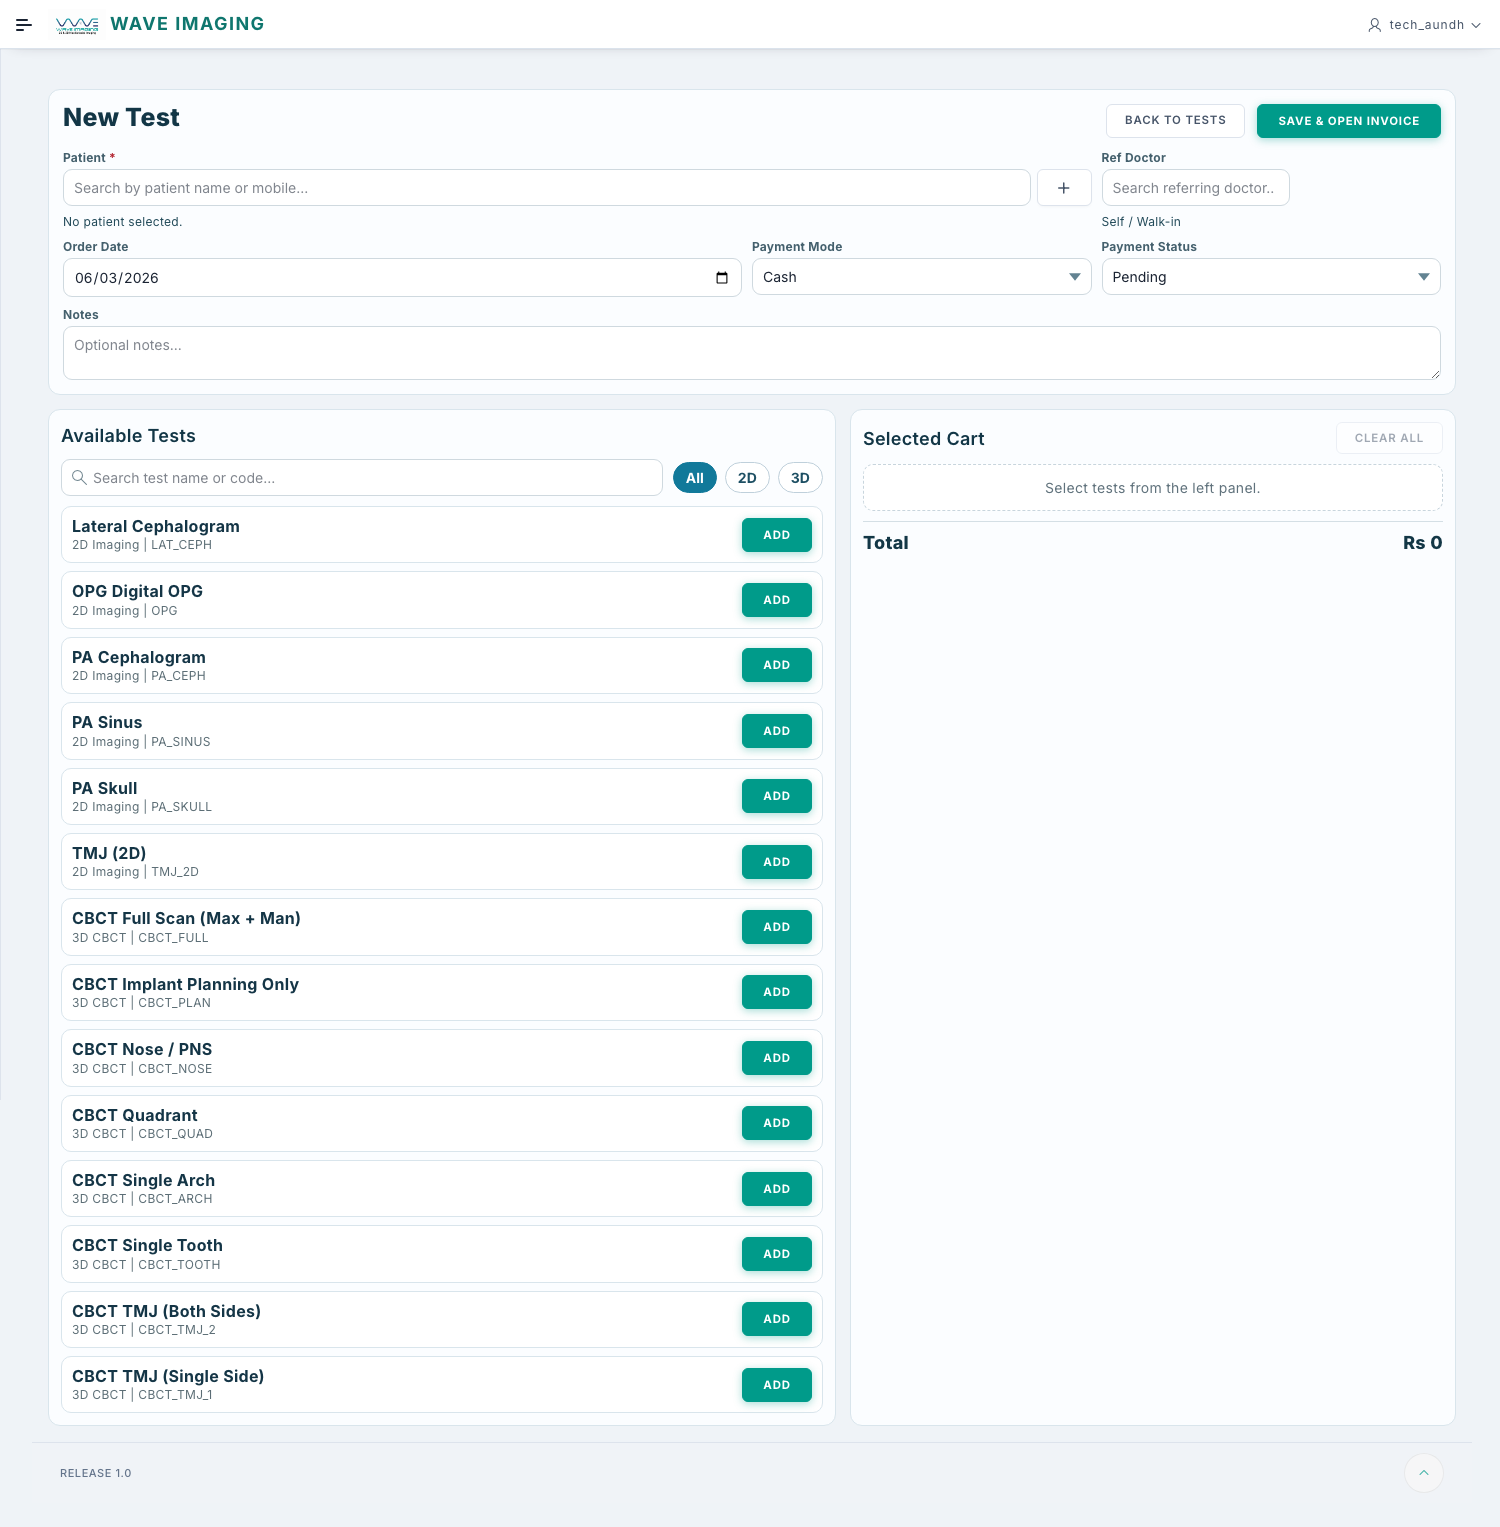
Patient search inside New Test
- Open New Test from Dashboard.
- Search for the patient in the patient search field.
- If the patient does not exist, use the + button there itself.
- Enter patient details and save.
Patient Register is mainly for reference. Daily patient creation usually happens from New Test.
New Test
Create a new test
- Open New Test from Dashboard.
- Select the patient and referring doctor.
- Select the service.
- Check order date and fee.
- Set payment mode and payment status.
- Confirm whether reporting is needed.
- Add notes if needed.
- Click Place Order.
Centre selection is not required for normal technician users. The app uses the centre linked to the logged-in user.
Check before saving
Patient, doctor, service, and fee should all match the actual visit.
Use notes carefully
Add only useful centre notes that help the next step in the workflow.
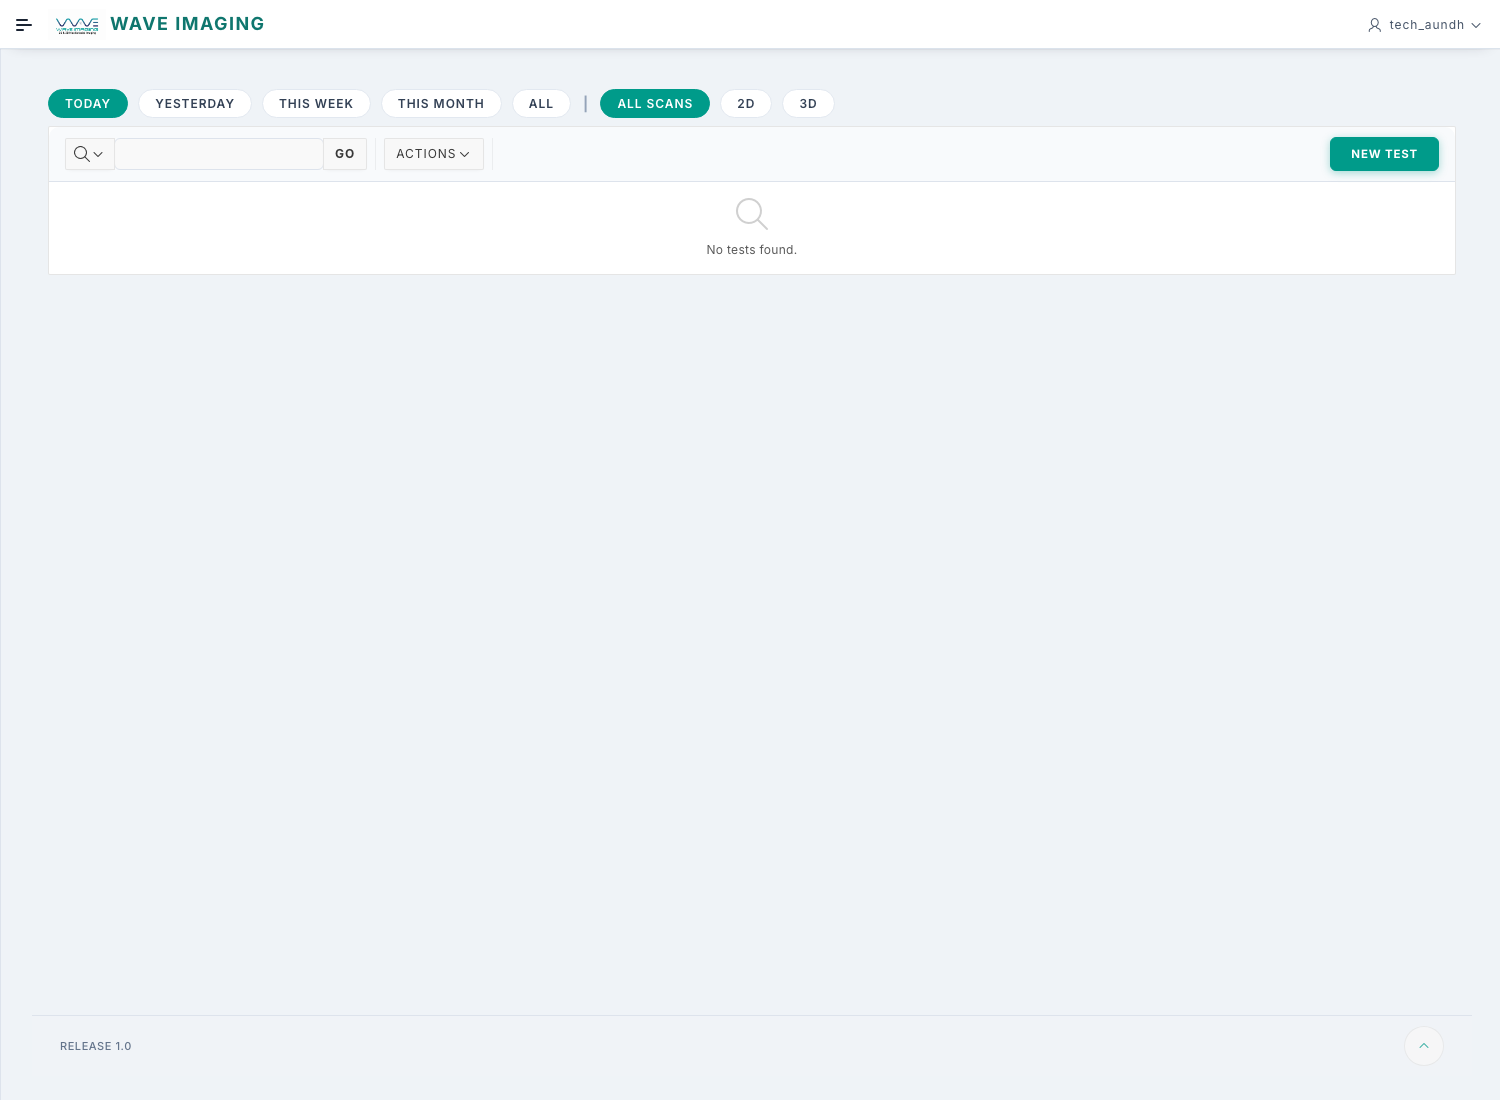
Main Screen
Work from the Tests page
After test creation, the Tests screen becomes the main working screen.
- Use the date, scan type, and centre filters to reduce the list.
- Open the edit action to correct test details.
- Use row actions to open DICOM, Cross Sections, report PDF, or WhatsApp share when visible.
- If your role shows it, use the radiologist allotment action carefully.
Status Updates
Update scan, payment, and report status
- Find the correct order on Tests.
- Move scan status as work progresses: Pending, In Progress, Completed.
- Update payment status when money is received: Pending, Partial, or Paid.
- Update report status only when the case is truly at the next stage.
Status changes are visible to other users. Do not update them early just to clear the list.
Handoff
Manage Drive links and complete handoff
- Open the link action from the test row.
- Paste the Google Drive folder link containing the uploaded image set.
- Paste the Cross Sections link if available.
- Paste the final report PDF link when the radiologist has completed reporting.
- Click Save Links.
The radiologist works from the shared Google Drive folder and then marks the case as Reported in Wave Imaging. After that, the technician can print the report and send WhatsApp communication from the Tests screen.
Some teams may use an Attach Report dialog instead of the link dialog. If that is part of your centre workflow, attach the final report there and mark it ready.
Billing
Invoice or receipt work
- Open the receipt or order link from the test row.
- Review patient, service, and amount details.
- Print or save the invoice if your centre needs it.
Common Mistakes
Avoid these issues during daily work
Search before creating
Avoid duplicate patients and duplicate tests.
Avoid duplicate patients and duplicate tests.
Check links after saving
A broken DICOM or report link slows the next user immediately.
A broken DICOM or report link slows the next user immediately.
Use your main work device
Keep push notifications active where you actually work.
Keep push notifications active where you actually work.
Sign out on shared systems
Do not leave active sessions open at the front desk or scan room.
Do not leave active sessions open at the front desk or scan room.